
Have you ever made cheese or yogurt from scratch? Here in Shipka we do it quite often, and even we are not experts, we can share with you our way of doing it.
Everything started with a visit to a neighbor in the village to buy fresh milk. We were so lucky that day because we could see her cows being milked right when we arrived.
Here’s how we turned that fresh milk into delicious homemade yogurt and cheese:
Pasteurizing the Milk
The first step is to ensure the milk is safe to be used. We poured the milk into a large pot and
heated it. The goal is to reach 75°C and hold it for about 20 seconds, but if you don”t have a termometer you can just let it boil.
Making Yog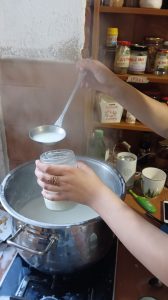 urtTo make yogurt, we poured part of the warm milk into clean glass jars, you should let it cool a bit after pasteurizing it so the glass jars don’t break. When the milk cools to about45°C (or until when you can hold your finger in the milk for 30 seconds without it burning).
Afterwards we added a couple of tablespoons of plain yogurt as a starter (if you already have homemade yogurt don’t doubt on using it). Stir gently to mix, then cover the jars and wrap them with a blanket to lower the temperature slowly. Let the yogurt sit undisturbed for 8 hours or overnight (outside of the fridge!!). It will be ready in the morning.
Making Cheese
In a separete pot than the yogurt, and without letting it cool down but with the heat turned off, we added some vinegar and/or lemon juice. Stir it gently and watch how the milk starts to curdle.
Once the curds had fully formed (wait for a few minutes), pour the mixture into a clean cloth, set over a colander. Squeez to remove excess whey. The longer you press, the firmer the cheese becomes. Let
it drain an after about an hour, we unwrapped a soft, fresh cheese ready to eat. Before it fully drains you can also add salt or spices and experiment with its flavor.
Extra tip Save the leftover whey. It’s full of proteins and can be used to cook.